
For brands with a brick-and-mortar presence, claiming your Instagram geotag is a no-brainer.
But what about ecommerce brands? Or direct-to-consumer companies operating online only?
Despite popular belief, geotags on Instagram can work for...
- Big box brands with multiple locations
- Ecommerce brands with no physical location (see below)
- Companies with a headquarters or “office” but no actual storefront

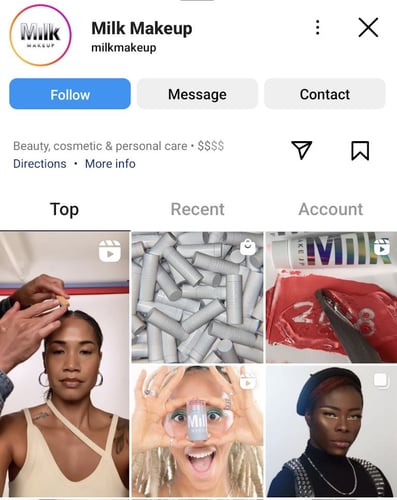
Source: @denisemuartistry
Tagged locations are a subtle way to put your trademark on an Instagram post. Not to mention add some creative flair to your branded content. For retailers, geotags likewise can drive foot traffic to specific stores. We've seen this firsthand for our own brands running retail support campaigns.
Here’s the good news: creating a custom geotag is fair game for businesses of all sizes.
The process is quick but can be a bit confusing. That’s exactly we wrote this post breaking down how to make an Instagram geotag step-by-step.
If you’re ready to run through the process, jump ahead to the steps.
Why Do Brands Make Their Own Instagram Geotags, Though?
Fair question! Geotags might not seem like a priority for growing your Instagram presence.
That said, creating a custom location can benefit your brand. Let’s briefly break down how.
Let People Know Where They Can Find Products
No big surprises here. Again, brands with physical stores should 100% claim their locations.
Because geotags let potential customers know exactly where they can find you.
As more consumers use Instagram as a search engine, location tags are key for discovery.

Source: @haleymartinoxo
Instagram geotags can support retailers by highlighting your products in physical stores. This is obviously important for companies with multiple locations. For example, geotags allow creators to promote your brand and a specific store at the same time.
Food for thought: Instagram has been testing new map features for a while now. Location tags are a smart way to get more eyes on specific storefronts you want to drive foot traffic to.
Build Brand Awareness
Anything you can do to boost engagement and build awareness on IG is a net positive.
Well, geotags put your brand’s name front and center on any tagged Instagram post.

Source: @looksandcooks.lindsay
The fact that locations are visible “above the fold” on any given post is a plus. People don’t have to read captions or tap through to see your brand’s name. Nice, right?
Consider also that you can source user-generated content from your geotag. The more your tag gets used, the more potential content you can earn.
Geotags Encourage Creative Content
If nothing else, geotags are a way for creators to inject some personality into their posts.
Many creators occasionally tag their content with playful or clever “locations.” This includes tags like “My Happy Place” or “The North Pole.”

Source: @glisteninghopes
Much like brands are eager for attention on Instagram, the same rules apply to creators. Geotags offer some much-needed creative flair for branded and non-branded content alike. Tags also encourage creators to create content "in the wild" or highlight brands in creative locations.

How to Create Instagram Geotags Step-by-Step
Before we get into the nitty-gritty of making an Instagram geotag, note the following:
- Geotags on Instagram are tied to tagged locations on Facebook. Instagram claims that new locations can’t be created and only “existing locations” can be tagged in posts. Translation? Before you tag a location on Instagram, it needs to exist on Facebook. Meta owns both Facebook and IG that's why locations are linked.
- You’ll need to access Facebook via the mobile app to create a custom location. Since geotags require location services, this process can’t be done solely on a desktop. Access to Facebook Business Manager and an active Facebook Page will help, too.
- Having a “headquarters” or established address for your business will streamline this process. That said, there are plenty of Instagram locations that aren’t tied to specific addresses (see below).
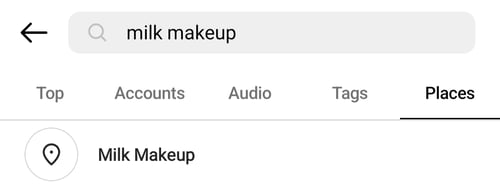
With all of that out of the way, let’s dive into the steps!
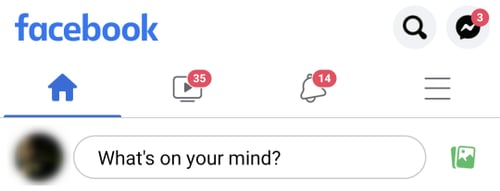
Step 1: Log into the Facebook app. Tap the “What’s on your mind?” prompt as if you were creating a new post. This should be done from a personal account (ideally, an account linked to your brand’s Facebook Page).
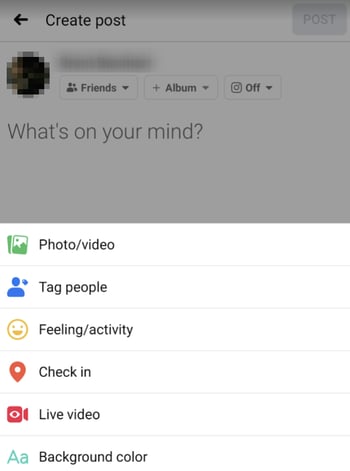
Step 2: Tap “Check in” from the “Create post” dropdown menu. Important: double-check that you’ve enabled location services. Otherwise, this won’t work. You’re essentially setting up a post to tag yourself at a location that doesn’t exist (yet).
Step 3: Upon reaching the “Add location” prompt, you’ll see a list of places. These are locations you’ve recently been tagged at. Begin typing the name of the location you want to claim. Here you can verify that your business’ geotag doesn’t exist yet. You can also confirm that someone else hasn’t already claimed your location.
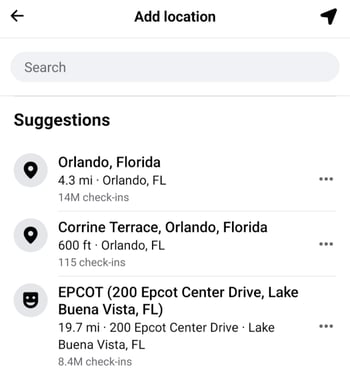
Step 4: Assuming your location doesn’t appear in the search bar, scroll to the bottom of the screen. Tap the “+ Add a new place” option. Note: initiating this prompt can be finicky. You may need to search multiple locations or type multiple phrases before it shows up.
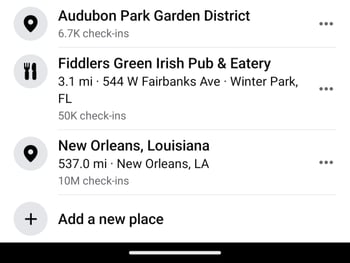
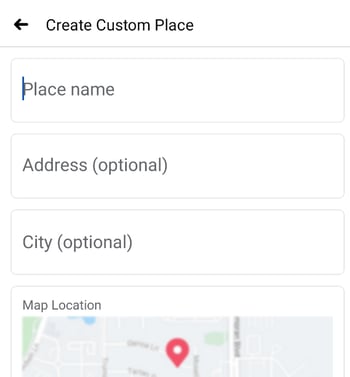
Step 5: You’ll then be directed to a “Create a Custom Place” screen. Here you can fill out the basic information for your desired Instagram geotag. When you’re done, tap “Save custom place.”
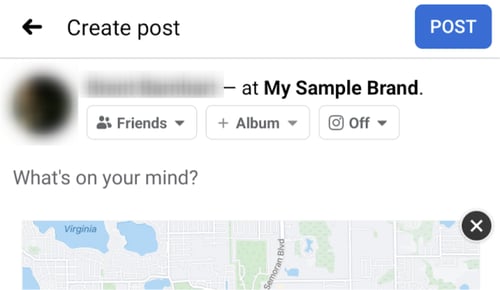
Step 6: Complete your post as normal. When you publish your post, the new location should be live on Facebook. You can confirm this in the post caption.
Step 7: Once your post is live, tap your custom location’s name. You’ll then be directed to a Facebook Page associated with the location. Assuming you created a new geotag and didn’t claim an existing place, the page will be “unofficial.” From here, claim your listing while logged into Facebook Business Manager. You’ll then link your location with your brand’s Facebook.

Note: between the creation and claiming process, it can take some time before your geotag shows up on Instagram. According to the platform itself, approval can happen within 48 hours. We’ve heard anecdotal reports of the process taking a couple of weeks. Be prepared to be patient!
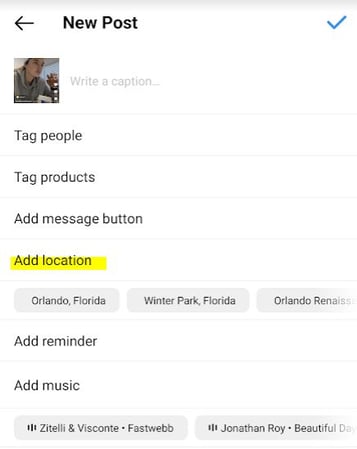

Once approved, hop over to Instagram and test your geotag. You should be able to tag your location via Posts or Instagram Stories by using the location sticker.

How to Get More Eyes on Your Brand’s Instagram Geotag
Geotags are a subtle way to cement your identity and look more legit on Instagram.
As noted earlier, anything you can do to establish your brand on IG is a plus.
Consider that awareness is the biggest influencer marketing goal for brands right now. When you create an Instagram geotag, you also create an evergreen trademark for your branded content. This can be used by your brand, customers and creators.
However, the stakes are much higher for retailers when it comes to having a geotag.
We often talk to brands that want influencers to promote products at specific locations and storefronts. Of course, geotargeting influencers is easier said than done.
Unless you're using a platform like Statusphere.
Through Statusphere's advanced matchmaking technology and creator network, we can actually send influencers into specific storefronts on your behalf. Our micro-influencer marketing platform matches brands with creators using 250+ first-party data points. This includes geotargeting!
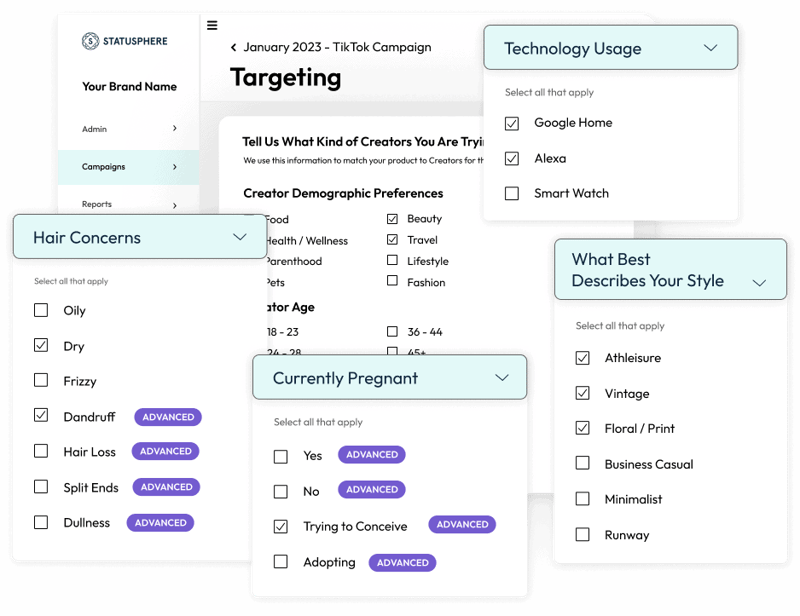
Statusphere eliminates the most time-consuming pieces of working with influencers in-house thanks to our advanced matchmaking and fulfillment technology. We’ve already generated 75,000+ pieces of content for 400+ consumer brands.
Want to see how our platform works? Get in touch with one of our experts to learn how we can boost your brand's retail presence with guaranteed content at scale.
